خيطي تنوره لبنوتك
شوفو معي هالخطوات الحلوه
لخياطه تنوره لبنوته
Supplies needed:
Fabric: a total of 1 1/2 to 2 yards of cotton of your choice (plenty for girls’ sizes), for a lady’s skirt you will have to do some simple math based on the dimensions of the strips we calculate in a bit; I’d say 2 1/2 yards should be plenty, but don’t hold me to that!
Thread
3/4″ wide elastic (enough to fit comfortably around waist plus a few inches)
Notes
All seam allowances are 5/8″.
The things I did differently are in red.
Measuring
To begin, you will need to determine the dimensions of the strips you are going to cut.
Step 1: Measure the waist and hips (in inches) of the intended wearer. Choose the larger of the 2 measurements, we will call this number “A”. You also need to determine the desired length of the finished skirt, so measure from the waist to where you want the hem to land; divide this number by 3 (you can do a little rounding here to make your life easier, maybe choose the closest 1/4″ or 1/2″ increment). Call this number “B”.
For example: peri has a waist measurement of approximately 20″ and the finished skirt should be about 13″ long.
A=20
B=4.5 (after rounding up)
Step 2: (sorry to bring algebra into the picture)
(A x 1.5) + 1.5 = _____ “C”
Again, you can round your answer a little, this is not an exact science.
Example:
C=31.5
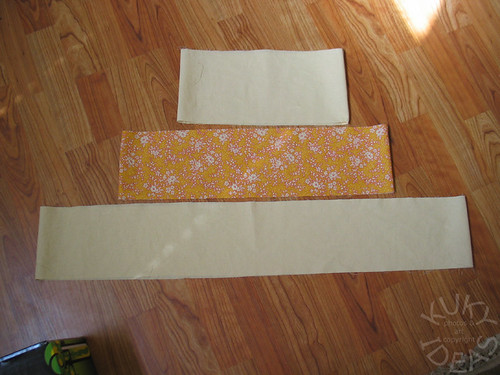
Step 3: You will cut 2 strips to make the top tier.
C divided by 2 = ____ width of each strip
B + 2 = ____ height of each strip
Example top tier: width=15.75″ height=6.5″
Step 4: You will cut 2 strips to make the middle tier.
C multiplied by 1.5 = ____ then divide your answer by 2 to equal your width ____
B + 1.25 = ____ height of each strip
Example middle tier: width=23.75″ (after rounding up) height=5.75″
Step 5: You will cut 3 strips to make the lower tier. Cut these strips to the same dimensions as those in Step 4. I decided to make 2 strips for the lower tier instead of 3 because I wanted the seams to match up. So I took the width of the middle tier multiplied by 3 = ____ then divide that by 2.
Example lower tier: width = 35.75″ (after rounding up) height=5.75″
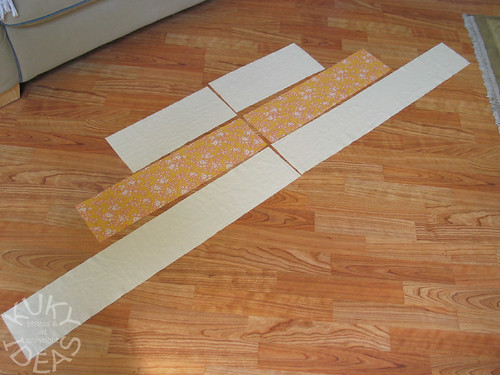
Now we have all of our pieces and are ready to start sewing!!
Sewing the Skirt
1. With right sides facing each other, sew the side seams together on each set of strips (remember for the lower tier you have 3 strips to sew together. well not my way. My way is 2 strips for each tier). Edge finish each of these seams with a serger if you have access to one, otherwise trim the seam allowance to about 1/4″ and zig-zag stitch to keep your raw edges from unraveling. You now have 3 “loops” of fabric, one for each tier.
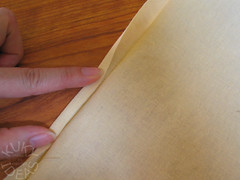
2. At this point, I like to go ahead and sew a narrow hem around the entire bottom edge of the lower tier. Press up 5/8″, open the fabric back out, and press the raw edge in to meet the first crease. Sew the hem.
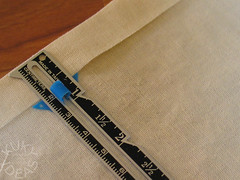
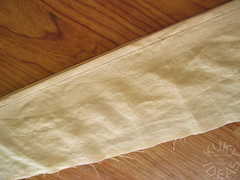
3. Edge finish the upper edge of the top tier, fold 1 1/4″ to the inside and press to form a casing for the elastic. Stitch about 1″ in from the fold almost all the way around, leaving a small opening to insert the elastic into later.
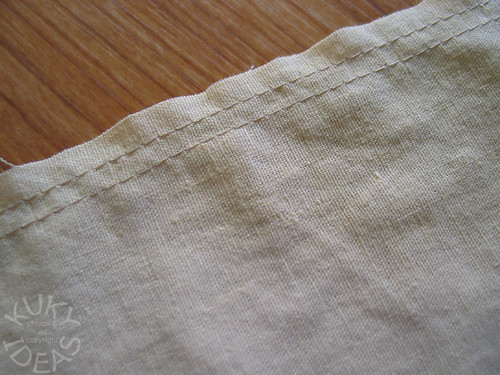
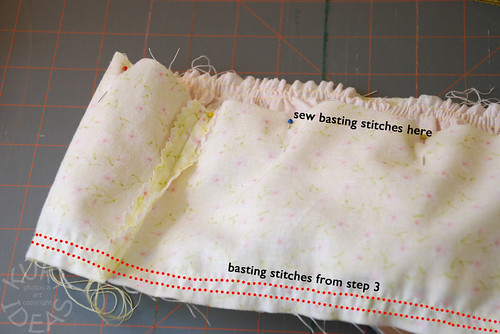
4. On the top edges of the middle and bottom tiers (and with right sides facing out), sew a long machine basting stitch all the way around 5/8″ from raw edge and also 3/8″ from raw edge.
And another change I made. I actually did 1/2″ from the raw edge and 1/4″ instead. I found out with Isabelle’s first skirt that I am a crap sewer and sometimes cannot sew straight. Doing it this way leaves 1/8″ margin for error. Which believe me I needed. You may not but obviously I suck.
5. Starting with the bottom tier, grasp the bobbin thread ends and start pulling gently to form gathers in the fabric. When the circumference of this edge matches that of the lower edge of the middle tier, stop and tie your bobbin threads together to keep everything in place. Then slide the gathers around until you are happy that they are distributed fairly evenly.

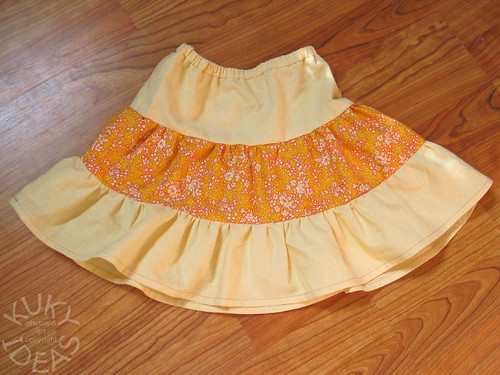
Update: I added some new pictures with a new skirt. Hope the different fabric doesn’t throw anyone off.

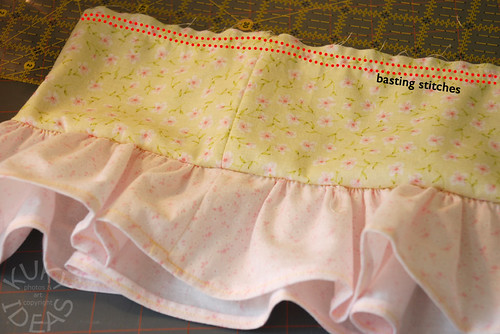
6. Flip the middle tier inside out so that the right sides (the outsides of your fabric) are facing each other and pin it to the bottom tier — the bottom edge of the middle tier (the edge without the basting) should match up to the top gathered edge of the lower tier and the right sides should be together. Now machine baste this seam. I machine basted at 1/2″ (again the whole sewing straight thing). I’m usually one that skips the basting steps, but, trust me, basting is your friend on this project! I also reduced the pressure on my presser foot for this step, don’t forget to readjust the setting after you baste.
Now you can flip it right side out and check your gathers. Don’t worry if you see the basting stitches from where you gathered the bottom tier. When you sew the seam at 5/8″ you won’t see them anymore.
7. Repeat the procedures from Steps 5 and 6 to attach the middle tier to the top tier.

8. Now serge or sew the seams you just basted using a 5/8″ seam allowance (trim and finish your edges if you used a regular sewing machine for this step).

9. Thread your elastic through the top casing. I like to use a big safety pin to help me work it through. Adjust the elastic to comfortably fit waist. Overlap the ends and sew them together (I used several rows of zig-zag stitch and zig-zag back-stitching for security). Using a straight stitch, sew the opening of the waistband casing closed.
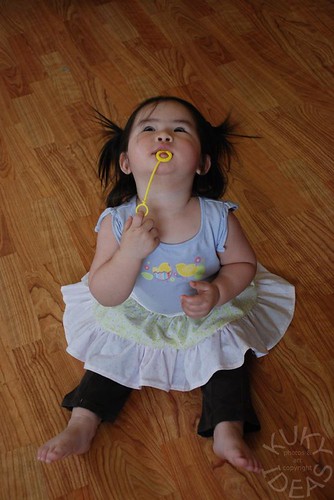
You’re Done!
YAY! And that was 3 Peas tiered skirt tutorial. Too bad I don’t have her pictures. I’m sure she had more pictures showing everything in more detail then what I did. But her directions are quite clear and it was quite simple to make this skirt. It was totally awesome of her to share her tutorial! Thank you 3 Peas!
Notes
All seam allowances are 5/8″.
The things I did differently are in red.
Measuring
To begin, you will need to determine the dimensions of the strips you are going to cut.
Step 1: Measure the waist and hips (in inches) of the intended wearer. Choose the larger of the 2 measurements, we will call this number “A”. You also need to determine the desired length of the finished skirt, so measure from the waist to where you want the hem to land; divide this number by 3 (you can do a little rounding here to make your life easier, maybe choose the closest 1/4″ or 1/2″ increment). Call this number “B”.
For example: peri has a waist measurement of approximately 20″ and the finished skirt should be about 13″ long.
A=20
B=4.5 (after rounding up)
Step 2: (sorry to bring algebra into the picture)
(A x 1.5) + 1.5 = _____ “C”
Again, you can round your answer a little, this is not an exact science.
Example:
C=31.5
Step 3: You will cut 2 strips to make the top tier.
C divided by 2 = ____ width of each strip
B + 2 = ____ height of each strip
Example top tier: width=15.75″ height=6.5″
Step 4: You will cut 2 strips to make the middle tier.
C multiplied by 1.5 = ____ then divide your answer by 2 to equal your width ____
B + 1.25 = ____ height of each strip
Example middle tier: width=23.75″ (after rounding up) height=5.75″
Step 5: You will cut 3 strips to make the lower tier. Cut these strips to the same dimensions as those in Step 4. I decided to make 2 strips for the lower tier instead of 3 because I wanted the seams to match up. So I took the width of the middle tier multiplied by 3 = ____ then divide that by 2.
Example lower tier: width = 35.75″ (after rounding up) height=5.75″
Now we have all of our pieces and are ready to start sewing!!
Sewing the Skirt
1. With right sides facing each other, sew the side seams together on each set of strips (remember for the lower tier you have 3 strips to sew together. well not my way. My way is 2 strips for each tier). Edge finish each of these seams with a serger if you have access to one, otherwise trim the seam allowance to about 1/4″ and zig-zag stitch to keep your raw edges from unraveling. You now have 3 “loops” of fabric, one for each tier.
2. At this point, I like to go ahead and sew a narrow hem around the entire bottom edge of the lower tier. Press up 5/8″, open the fabric back out, and press the raw edge in to meet the first crease. Sew the hem.
3. Edge finish the upper edge of the top tier, fold 1 1/4″ to the inside and press to form a casing for the elastic. Stitch about 1″ in from the fold almost all the way around, leaving a small opening to insert the elastic into later.
4. On the top edges of the middle and bottom tiers (and with right sides facing out), sew a long machine basting stitch all the way around 5/8″ from raw edge and also 3/8″ from raw edge.
And another change I made. I actually did 1/2″ from the raw edge and 1/4″ instead. I found out with Isabelle’s first skirt that I am a crap sewer and sometimes cannot sew straight. Doing it this way leaves 1/8″ margin for error. Which believe me I needed. You may not but obviously I suck.
5. Starting with the bottom tier, grasp the bobbin thread ends and start pulling gently to form gathers in the fabric. When the circumference of this edge matches that of the lower edge of the middle tier, stop and tie your bobbin threads together to keep everything in place. Then slide the gathers around until you are happy that they are distributed fairly evenly.
Update: I added some new pictures with a new skirt. Hope the different fabric doesn’t throw anyone off.
6. Flip the middle tier inside out so that the right sides (the outsides of your fabric) are facing each other and pin it to the bottom tier — the bottom edge of the middle tier (the edge without the basting) should match up to the top gathered edge of the lower tier and the right sides should be together. Now machine baste this seam. I machine basted at 1/2″ (again the whole sewing straight thing). I’m usually one that skips the basting steps, but, trust me, basting is your friend on this project! I also reduced the pressure on my presser foot for this step, don’t forget to readjust the setting after you baste.
Now you can flip it right side out and check your gathers. Don’t worry if you see the basting stitches from where you gathered the bottom tier. When you sew the seam at 5/8″ you won’t see them anymore.
7. Repeat the procedures from Steps 5 and 6 to attach the middle tier to the top tier.
8. Now serge or sew the seams you just basted using a 5/8″ seam allowance (trim and finish your edges if you used a regular sewing machine for this step).
9. Thread your elastic through the top casing. I like to use a big safety pin to help me work it through. Adjust the elastic to comfortably fit waist. Overlap the ends and sew them together (I used several rows of zig-zag stitch and zig-zag back-stitching for security). Using a straight stitch, sew the opening of the waistband casing closed.
You’re Done!
YAY! And that was 3 Peas tiered skirt tutorial. Too bad I don’t have her pictures. I’m sure she had more pictures showing everything in more detail then what I did. But her directions are quite clear and it was quite simple to make this skirt. It was totally awesome of her to share her tutorial! Thank you 3 Peas!
thanks 4
ليست هناك تعليقات:
إرسال تعليق